Ready to learn how to sew a fabulous wrap crop top? This trendy and versatile garment is a must-have in any fashionista’s wardrobe. In this article, we’ll guide you through the process of creating your own wrap crop top from scratch. Whether you’re a seasoned sewing pro or a beginner looking to try your hand at a new project, we’ve got you covered. So, grab your sewing machine and let’s get started on this stylish endeavor!
When it comes to fashion, there’s nothing quite like the satisfaction of wearing something you’ve made with your own two hands. Sewing your own wrap crop top allows you to unleash your creativity and create a unique piece that reflects your personal style. Plus, you’ll have the added benefit of a garment that fits you perfectly. No more settling for ill-fitting store-bought tops! With our step-by-step instructions, you’ll be able to sew a wrap crop top that flatters your figure and turns heads wherever you go. So, dust off your sewing skills and let’s dive into the wonderful world of wrap crop tops!
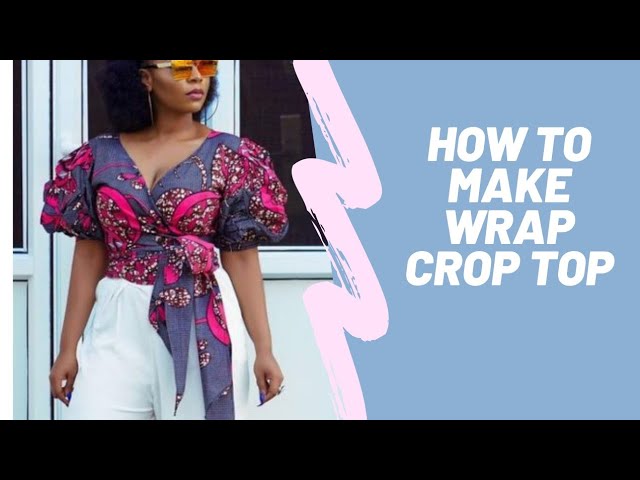
How to Sew a Wrap Crop Top
If you’re looking to add a trendy wrap crop top to your wardrobe, follow these simple steps:
- Choose a fabric of your choice and cut out two rectangular pieces, measuring the desired length and width.
- Place the two fabric pieces right sides together and sew along the sides, leaving the top open.
- Turn the top right side out and fold the raw edges of the top opening inward.
- Attach a tie or button closure to the top opening to secure the wrap.
- Finally, try on your new wrap crop top and enjoy the stylish and versatile addition to your outfits!
How to Sew a Wrap Crop Top
Creating your own wrap crop top is a fun and rewarding sewing project that allows you to customize your wardrobe. With a few materials and some basic sewing skills, you can make a stylish and unique wrap crop top that fits you perfectly. In this article, we will guide you through the process of sewing a wrap crop top from start to finish. Whether you’re a beginner or an experienced seamstress, you’ll find helpful tips and techniques to create a beautiful wrap crop top that you’ll love to wear.
Choosing the Right Fabric
The first step in sewing a wrap crop top is selecting the right fabric. Consider the style and fit you want to achieve when choosing your fabric. Lightweight and breathable fabrics such as cotton, linen, or rayon are ideal for a comfortable and summery wrap crop top. If you’re looking for a more structured and elegant look, you can opt for fabrics like silk or satin. Make sure to choose a fabric that has a good drape and is easy to work with.
When selecting your fabric, also consider the color or pattern that you want for your wrap crop top. Solid colors can create a classic and versatile look, while bold prints or patterns can add a touch of personality and flair. Take your time to browse through different fabric options and choose one that speaks to your personal style and preferences.
Measuring and Cutting the Fabric
Before you start sewing, it’s important to take accurate measurements and cut your fabric accordingly. Start by measuring your bust, waist, and hip circumference to determine the size of the wrap crop top you want to make. Use a measuring tape and refer to a size chart or pattern to find the appropriate measurements for your size.
Once you have your measurements, transfer them onto your fabric using a fabric marker or chalk. Be sure to add seam allowances to your measurements to allow for sewing. Carefully cut out the fabric pieces according to your measurements, making sure to follow any pattern markings or guidelines. Remember to cut mirror images for the front and back pieces of the wrap crop top.
Creating the Wrap Front
One of the defining features of a wrap crop top is the wrap front. To create this, you’ll need to sew two front panels together. Place the front panels right sides together and sew along the side seams, leaving the bottom open for the wrap. Finish the raw edges with a serger or a zigzag stitch to prevent fraying.
Next, fold and press the raw edges of the wrap front, creating a clean and neat finish. You can fold the edges twice for added durability and a professional look. Secure the folded edges with pins or clips, and stitch close to the folded edge to create a hem. This will give your wrap crop top a polished and finished appearance.
Constructing the Back and Straps
After creating the wrap front, it’s time to construct the back of the wrap crop top and the straps. Place the back panels right sides together and sew along the side seams, leaving the bottom open. Finish the raw edges with a serger or a zigzag stitch.
To create the straps, cut two long strips of fabric according to your desired width. Fold each strip in half lengthwise, right sides together, and sew along the long edge. Turn the straps right side out using a turning tool or a safety pin, and press them flat with an iron. Attach the straps to the back of the wrap crop top, aligning them with the shoulder seams, and secure them with stitching.
Assembling the Wrap Crop Top
Now that you have all the individual pieces, it’s time to assemble the wrap crop top. Place the front and back pieces right sides together, aligning the shoulder seams. Sew along the shoulder seams, and finish the raw edges with a serger or a zigzag stitch. Press the seams open to create a clean finish.
Next, attach the wrap front to the back of the crop top by sewing along the side seams. Make sure to align the wrap edges and secure them with stitching. Finish the raw edges with a serger or a zigzag stitch to prevent fraying.
Finishing Touches
After assembling the wrap crop top, it’s time for the finishing touches. Hem the bottom of the crop top by folding the raw edge twice and stitching close to the folded edge. This will give your top a polished and professional finish.
If desired, you can also add embellishments such as buttons, lace trim, or decorative stitching to personalize your wrap crop top. Be creative and experiment with different details to make your top truly unique.
Caring for Your Wrap Crop Top
To ensure that your wrap crop top lasts for a long time, it’s important to care for it properly. Check the fabric care instructions and follow them accordingly. Most fabrics can be machine washed on a gentle cycle and air-dried or tumble-dried on low heat. Avoid using bleach or harsh detergents that can damage the fabric.
When storing your wrap crop top, fold it neatly and place it in a drawer or hang it on a hanger to prevent wrinkles. If necessary, you can lightly press the top with a warm iron to remove any wrinkles before wearing.
Final Thoughts
Sewing a wrap crop top allows you to unleash your creativity and create a garment that perfectly fits your style. With the right fabric, measurements, and sewing techniques, you can make a beautiful and fashionable wrap crop top that you’ll be proud to wear. Follow the steps outlined in this article, and enjoy the process of sewing your own wrap crop top.
Key Takeaways: How to Sew a Wrap Crop Top?
- Choose a fabric that is lightweight and breathable.
- Measure and cut the fabric according to your desired crop top length.
- Create a wrap front by sewing two triangular fabric pieces together.
- Add a tie or button closure for easy wearing.
- Finish the edges with a hem or bias binding for a polished look.
Frequently Asked Questions
What materials do I need to sew a wrap crop top?
To sew a wrap crop top, you’ll need the following materials:
1. Fabric of your choice – preferably lightweight and breathable fabrics such as cotton or linen.
2. Sewing machine or needle and thread.
3. Scissors.
4. Measuring tape or ruler.
5. Pins.
6. Iron and ironing board.
Make sure to gather all these materials before you start sewing your wrap crop top.
How do I take measurements for a wrap crop top?
Before you start sewing, it’s important to take accurate measurements to ensure the perfect fit for your wrap crop top. Here’s how you can do it:
1. Measure your bust – wrap the measuring tape around the fullest part of your bust and note down the measurement.
2. Measure your waist – wrap the measuring tape around the narrowest part of your waist and record the measurement.
3. Measure your desired length – decide how long you want your wrap crop top to be and measure from your shoulder to that point.
By taking these measurements, you can create a wrap crop top that fits you perfectly.
What are the steps to sew a wrap crop top?
Follow these steps to sew a wrap crop top:
1. Prepare the fabric – wash and iron the fabric before cutting to avoid any shrinkage or wrinkles.
2. Cut the fabric – using your measurements, cut out the front and back pieces of the top, as well as the sleeves if desired.
3. Sew the side seams – with right sides together, sew the side seams of the top using a straight stitch.
4. Create the wrap – fold and hem the edges of the front pieces to create the wrap effect.
5. Attach the sleeves (optional) – if you’re adding sleeves, sew them onto the armholes of the top.
6. Finish the edges – hem the bottom of the top and any other raw edges for a clean finish.
7. Try on and make adjustments – try on the wrap crop top and make any necessary adjustments for the perfect fit.
By following these steps, you’ll be able to sew your own stylish wrap crop top.
Can I customize the design of my wrap crop top?
Absolutely! Sewing your own wrap crop top gives you the freedom to customize the design according to your preferences. Here are some ways you can customize your wrap crop top:
1. Choose different fabrics – experiment with different colors, patterns, and textures to create a unique look.
2. Add embellishments – consider adding lace, buttons, or embroidery to enhance the design.
3. Adjust the length – if you prefer a longer or shorter crop top, you can easily modify the length according to your style.
4. Play with sleeve options – you can choose to add sleeves or go for a sleeveless design depending on your preference.
Remember, the key is to have fun and unleash your creativity while sewing your wrap crop top.
Are there any tips for beginners to sew a wrap crop top?
If you’re a beginner at sewing, here are some tips to keep in mind when sewing a wrap crop top:
1. Start with a simple design – choose a basic wrap crop top pattern that doesn’t involve complex techniques.
2. Take your time – sewing requires patience, so don’t rush through the process. Take breaks if needed.
3. Practice your stitches – before sewing the actual garment, practice your stitches on scrap fabric to gain confidence.
4. Follow a tutorial – watch video tutorials or read step-by-step guides to better understand the sewing process.
5. Ask for help – if you’re unsure about certain steps or techniques, don’t hesitate to ask for help from experienced sewers or join online sewing communities for advice.
Remember, practice makes perfect, so keep sewing and enjoy the process of creating your own wrap crop top.
HOW TO CUT AND SEW A WRAP TOP/ Beginners friendly.
Final Thoughts: Sewing Your Own Wrap Crop Top
Crafting your own wrap crop top is not only a fun and creative project, but it also allows you to customize your wardrobe with a unique and personalized piece. By following the steps outlined in this tutorial, you can confidently sew your own wrap crop top and showcase your style and sewing skills. Remember to choose a fabric that speaks to your personality and to take accurate measurements for a perfect fit.
The process of sewing a wrap crop top may seem daunting at first, but with practice and patience, you’ll soon become a pro. Don’t be afraid to experiment with different fabrics, prints, and embellishments to create a variety of stylish wrap crop tops to add to your collection. Whether you’re a seasoned seamstress or a beginner, this project is a great way to enhance your sewing skills and express your fashion sense.
So, gather your sewing supplies, unleash your creativity, and embark on the journey of sewing your very own wrap crop top. With each stitch, you’ll not only create a fashionable piece of clothing but also gain a sense of pride and accomplishment. Enjoy the process and let your sewing skills shine as you rock your handmade wrap crop top with confidence and style!