Ready to rock the summer fashion scene? Want to add a touch of boho chic to your wardrobe? Well, look no further because I’ve got the perfect DIY project for you – how to make a fringe crop top! This trendy and fun garment is all the rage right now, and with a little creativity and some basic sewing skills, you can create your very own fringe crop top that will make heads turn. So, grab your scissors, thread, and fabric, and let’s get started on this fabulous fashion adventure!
Picture yourself at a music festival, swaying to the beat of your favorite band, feeling the warm sun on your skin, and looking effortlessly stylish in your very own handmade fringe crop top. The best part? You don’t have to break the bank to get this fashionable look. With just a few simple steps, you can transform an old t-shirt or piece of fabric into a trendy fringe crop top that will make you the envy of all your friends. Whether you’re a seasoned DIY enthusiast or a beginner looking to dip your toes into the world of fashion design, this project is perfect for you. So, let’s dive in and learn how to make a fringe crop top that will elevate your summer style to a whole new level!
How to Make a Fringe Crop Top
If you want to add some boho flair to your wardrobe, why not make a fringe crop top? Here’s a step-by-step tutorial to help you create your own stylish piece:
- Start by selecting a plain crop top that fits you well.
- Cut strips of fringe fabric, making sure they are longer than the desired length of the fringe.
- Sew the strips of fringe to the bottom edge of the crop top, spacing them evenly.
- Trim the fringe to your desired length.
- Voila! Your fringe crop top is ready to wear and show off your fashion-forward style.
Create this trendy piece with ease and rock your unique style!
How to Make a Fringe Crop Top?
Looking for a trendy and unique addition to your wardrobe? A fringe crop top might be just what you need. This stylish garment has become increasingly popular in recent years, and it’s no surprise why. Fringe crop tops are versatile, fun, and perfect for adding a touch of bohemian flair to any outfit. Whether you’re attending a music festival or simply want to make a fashion statement, learning how to make your own fringe crop top is a great way to express your personal style. In this article, we’ll guide you through the process, step by step, so you can create a fabulous fringe crop top that’s tailored to your taste and preferences.
Choosing the Right Fabric and Supplies
Before you begin making your fringe crop top, it’s important to gather all the necessary supplies. The first step is to choose the right fabric. Look for a lightweight and flowy material that will drape nicely when the fringe is added. Common fabric choices for crop tops include cotton, linen, and chiffon. Consider the color and pattern of the fabric as well, as this will impact the overall look of your top. Once you have your fabric, you’ll also need some basic sewing supplies, such as scissors, thread, and a sewing machine or needle. Don’t forget to have a measuring tape on hand to ensure accurate sizing.
When it comes to the fringe itself, you have a few options. You can purchase pre-made fringe trim from a fabric store, or you can make your own by cutting strips of fabric. If you choose to make your own fringe, consider using a fabric that complements or contrasts with your main fabric choice. This will add visual interest and make your fringe crop top truly unique. Additionally, you may want to invest in some fabric glue or a hot glue gun to secure the fringe in place.
Step 1: Taking Measurements
Before you start cutting and sewing your fabric, it’s essential to take accurate measurements to ensure a proper fit. Begin by measuring your bust, waist, and hips. These measurements will help you determine the size of the crop top and how much fabric you’ll need. Keep in mind that crop tops are typically more fitted, so it’s important to choose the right size to ensure a flattering look. Once you have your measurements, use a pattern or create your own based on the desired length and style of your crop top.
Once you have your pattern and fabric ready, it’s time to move on to the next step: cutting the fabric. Lay your fabric flat on a clean, flat surface and place the pattern on top. Use fabric scissors to carefully cut around the pattern, following the outlined shape. Be sure to cut two identical pieces for the front and back of the crop top. If you’re adding sleeves or straps, cut those pieces as well. Remember to leave a seam allowance of about 1/2 inch around each piece for sewing.
Now that you have your fabric pieces cut, it’s time to start sewing! Using a sewing machine or needle and thread, sew the front and back pieces together along the sides and bottom, leaving the armholes and neckline open. Be sure to backstitch at the beginning and end of each seam to secure the stitches. If you’re adding sleeves or straps, attach them at this stage as well. Once the main construction is complete, it’s time to move on to the fun part: adding the fringe.
Step 2: Adding the Fringe
Now comes the exciting part – adding the fringe to your crop top. If you’re using pre-made fringe trim, measure the length of the trim and cut it to fit along the bottom edge of the top. Pin the trim in place, ensuring that it’s evenly distributed and aligned with the hemline. Once you’re satisfied with the placement, sew the trim onto the fabric using a straight stitch or zigzag stitch. Alternatively, if you’re making your own fringe, cut long strips of fabric and fold them in half lengthwise. Attach the folded edge of the fringe along the bottom edge of the top, again ensuring even distribution and alignment. Sew the fringe to the fabric, securing it in place.
Once the fringe is attached, carefully trim any excess fabric or fringe that extends beyond the hemline. This will give your crop top a neat and polished look. If desired, you can also add fringe to the sleeves or neckline for added flair. Simply repeat the process outlined above and secure the fringe in place with stitching or glue. Once you’re finished, give your fringe crop top a final press with an iron to smooth out any wrinkles and ensure a professional finish.
Styling Your Fringe Crop Top
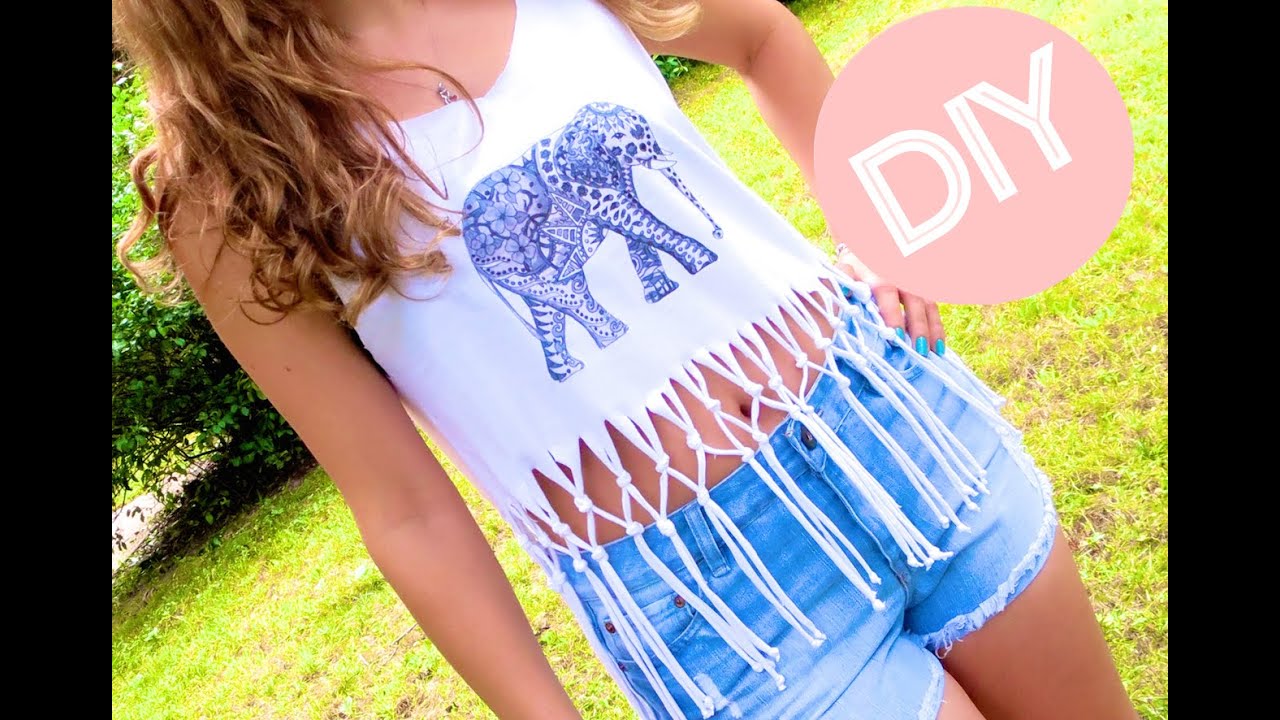
Now that you’ve successfully made your fringe crop top, it’s time to show it off and incorporate it into your wardrobe. There are countless ways to style this versatile garment, depending on the occasion and your personal style. For a casual and bohemian look, pair your fringe crop top with high-waisted denim shorts and sandals. Add some statement jewelry, such as layered necklaces or oversized earrings, to complete the look. If you’re heading to a music festival, consider pairing your crop top with a flowy maxi skirt and ankle boots for a fun and free-spirited vibe.
For a more polished and sophisticated look, layer your fringe crop top over a fitted camisole or tank top and pair it with tailored trousers or a high-waisted skirt. Add heels and a structured blazer for a chic and fashionable ensemble. The key is to experiment with different combinations and find the style that suits you best. Don’t be afraid to mix textures and patterns for added visual interest, and always accessorize to elevate your outfit.
In conclusion, creating your own fringe crop top is a fun and rewarding DIY project that allows you to express your personal style. By choosing the right fabric, taking accurate measurements, and following the steps outlined above, you’ll have a fabulous fringe crop top that you can proudly wear. Whether you’re attending a summer festival or simply want to add a touch of bohemian flair to your everyday outfits, a fringe crop top is a versatile and trendy choice. So get creative, have fun, and enjoy the process of making your own unique garment. Happy crafting!
Key Takeaways – How to Make a Fringe Crop Top
- Choose a plain crop top as your base.
- Measure and mark where you want the fringe to start.
- Cut strips of fabric or use pre-made fringe.
- Sew or glue the fringe onto the crop top.
- Trim any excess fringe and secure the ends.
Frequently Asked Questions
What materials do I need to make a fringe crop top?
To make a fringe crop top, you will need the following materials:
– A plain crop top or a regular t-shirt that you can cut into a crop top.
– Fringe trim or fabric strips.
– Fabric scissors.
– A ruler or measuring tape.
– Pins.
– A sewing machine or needle and thread.
How do I measure and cut the crop top?
Start by putting on the crop top and deciding how short you want it to be. Use a ruler or measuring tape to measure the desired length from the bottom of the top. Mark this measurement with a pin. Then, remove the top and use fabric scissors to cut along the marked line. Be sure to cut straight across to achieve an even crop.
If you are working with a regular t-shirt, put it on and follow the same process to determine the desired length. Mark and cut accordingly.
How do I add the fringe to the crop top?
Once you have your crop top ready, it’s time to add the fringe. Measure the width of your crop top and cut the fringe trim or fabric strips to match this measurement. If using fabric strips, cut them to the desired width and length.
Starting from the bottom of the crop top, pin the fringe trim or fabric strips along the edge, making sure to leave a small space between each piece. Once all the fringe is pinned in place, sew it onto the crop top using a sewing machine or needle and thread. Remove the pins as you go along.
Can I customize the fringe length?
Yes, you can definitely customize the fringe length to your preference. Before cutting the fringe trim or fabric strips, decide how long you want the fringe to be. If you prefer shorter fringe, cut the trim or fabric strips accordingly. For longer fringe, simply cut them longer.
Remember to consider the overall look and style you want to achieve with your fringe crop top. Experiment with different fringe lengths to find the perfect one for you.
How can I style my fringe crop top?
A fringe crop top can be styled in various ways to create a trendy and fashionable look. Here are a few styling ideas:
– Pair your fringe crop top with high-waisted jeans or shorts for a casual yet chic outfit.
– Layer the crop top over a solid-colored tank top or bodysuit for added coverage and dimension.
– Accessorize with statement jewelry, such as a chunky necklace or hoop earrings, to enhance the bohemian vibe of the fringe.
– Complete the look with a pair of stylish sandals or ankle boots, depending on the season and occasion.
Remember, the key is to have fun and experiment with different combinations to create your own unique style with the fringe crop top.
Cut fringe on the bottom of a shirt – Make fringe on a tshirt – Easy DIY tshirt – Cinderella Sew
Final Thoughts: Get Your Fringe On!
So there you have it, my fashion-forward friends! Now you know how to make a fringe crop top that will have heads turning wherever you go. With just a few simple steps and some creative flair, you can transform an ordinary t-shirt into a trendy and stylish statement piece.
Not only is this DIY project a fun and budget-friendly way to upgrade your wardrobe, but it also allows you to express your unique sense of style. Whether you prefer a boho-chic look or a more edgy vibe, the possibilities are endless with a fringe crop top. Add some fringe to your life and watch as your outfit becomes an instant conversation starter.
Remember, when it comes to fashion, there are no rules! Feel free to experiment with different colors, materials, and lengths to create a fringe crop top that truly reflects your personality. And don’t forget to share your fabulous creations with the world. Who knows, you might just inspire someone else to embrace their inner fashionista and make their own fringe crop top!
So what are you waiting for? Grab your scissors, gather your materials, and let your creativity run wild. Get ready to rock the fringe like never before and turn heads with your one-of-a-kind style. Happy crafting, fashionistas!