Hey there, fashionistas! Are you ready to jazz up your wardrobe and add a touch of creativity to your style? Well, you’re in luck because today we’re diving into the world of fashion DIYs and learning how to make a crop top from a big shirt. Yes, you heard that right! With just a few simple steps and some basic sewing skills, you can transform an oversized shirt into a trendy and flattering crop top that will turn heads wherever you go. So, grab your scissors and let’s get crafty!
Picture this: You have this super cute shirt that you absolutely adore, but it’s just too big for your liking. Instead of letting it gather dust in your closet, why not give it a new lease on life? By making a crop top out of it, you can create a stylish and unique piece that is tailored to your personal taste. Plus, it’s a fun and budget-friendly way to upcycle old clothes and reduce waste. So, let’s break out the sewing kit and embark on this fashion adventure together. Get ready to unleash your inner designer and rock that crop top with confidence!
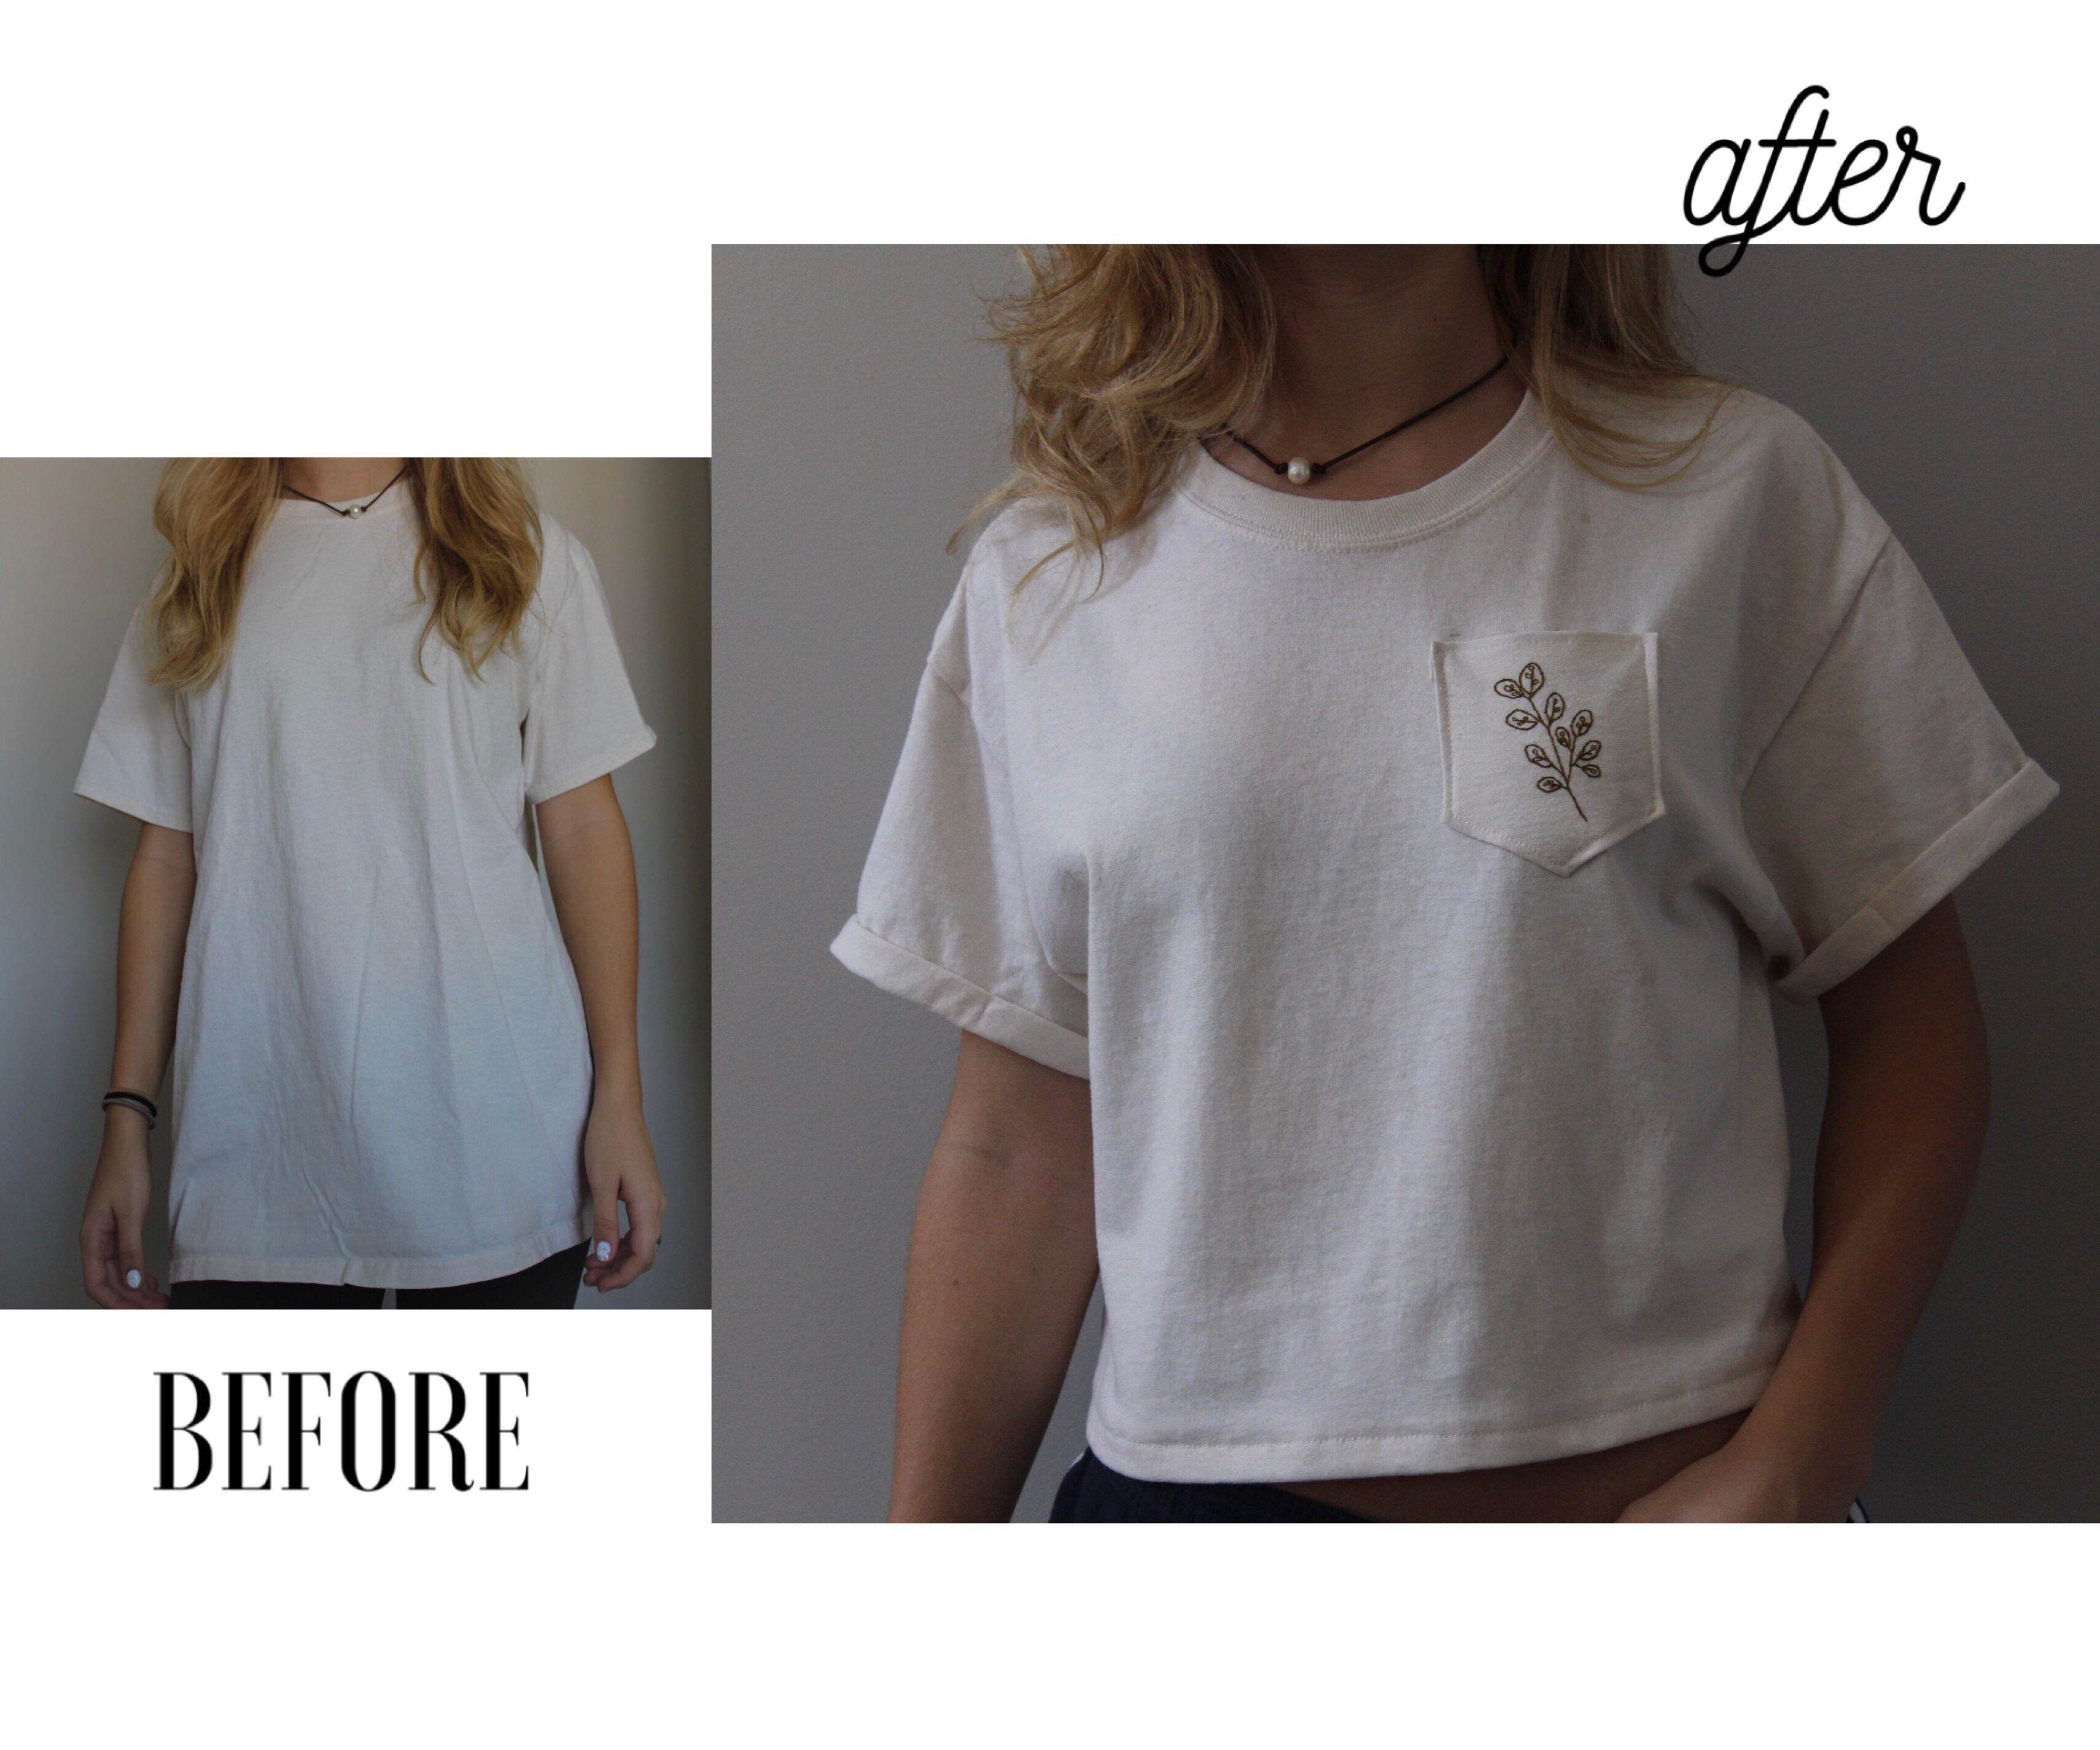
How to Make a Crop Top From a Big Shirt?
- Start by choosing a big shirt that you want to transform into a crop top.
- Measure and mark the desired length for your crop top.
- Cut along the marked line to create your crop top.
- If you want a more fitted look, you can also take in the sides of the shirt by sewing or using fabric glue.
- Finish the edges of your crop top by hemming or using fray stopper.
- Try on your new crop top and make any adjustments if needed.
- Pair it with high-waisted jeans or a skirt for a trendy look!
How to Make a Crop Top From a Big Shirt?
Are you tired of your old, oversized shirts taking up space in your closet? Why not transform them into trendy crop tops? Making a crop top from a big shirt is a fun and creative way to upcycle your old clothes and give them a fresh new look. In this article, we will guide you through the step-by-step process of turning a big shirt into a stylish crop top. Get ready to unleash your inner fashion designer and create a unique piece that showcases your personal style!
Gather Your Materials
The first step in making a crop top from a big shirt is to gather all the necessary materials. Here’s what you’ll need:
- A big shirt
- Fabric scissors
- Pins
- A sewing machine or needle and thread
- Measuring tape
- Optional: embellishments like lace, beads, or patches
Once you have all your materials ready, you can start the transformation process.
Measure and Mark
The next step is to measure and mark the desired length of your crop top. Put on the big shirt and decide how short you want it to be. Keep in mind that crop tops typically end around the midriff area, but you can adjust the length to your preference. Use a measuring tape to ensure accuracy and mark the desired length with pins.
After marking the length, take off the shirt and lay it flat on a table or any other suitable surface for cutting and sewing.
Cut Along the Marked Line
With your fabric scissors, carefully cut along the marked line to remove the excess length of the shirt. Take your time and make sure the cut is straight and even. If you want a more distressed look, you can create a jagged or uneven hemline.
Once you’ve cut the shirt, try it on again to see if the length is as desired. If you want it shorter, make additional cuts until you achieve the perfect crop top length.
Finish the Edges
To prevent the fabric from fraying, it’s important to finish the edges of your crop top. You have a few options for finishing the edges:
- Using a sewing machine: Fold the raw edge of the fabric under and sew a straight stitch along the edge to secure it.
- Using a needle and thread: Use a whipstitch or a blanket stitch to sew along the edge, enclosing the raw fabric.
- Using fabric glue: Apply a thin line of fabric glue along the edge and press it down to seal the fabric.
Choose the method that works best for you and your sewing skills.
Add Personal Touches
Now that you have the basic crop top, it’s time to add some personal touches to make it truly unique. You can embellish your crop top with lace trim, beads, patches, or any other decorative elements you like. Get creative and let your imagination run wild!
If you’re using lace trim, for example, you can sew it along the hemline or the sleeves of your crop top. Beads and patches can be sewn or glued onto the fabric to create eye-catching designs. The possibilities are endless, so have fun with it!
Style and Wear Your Crop Top
Once you’ve finished adding your personal touches, your crop top is ready to be styled and worn. Pair it with high-waisted jeans or a skirt for a trendy look. Layer it with a cardigan or a denim jacket for added versatility. The beauty of crop tops is that they can be dressed up or down, depending on the occasion.
Experiment with different accessories, such as statement earrings or layered necklaces, to complete your outfit. Remember, the key to rocking a crop top is confidence, so wear it proudly and embrace your unique style.
Making a crop top from a big shirt is not only a sustainable fashion choice but also a fun and creative DIY project. By repurposing your old clothes, you can create one-of-a-kind pieces that reflect your personal style. So, grab that big shirt from your closet and let your inner fashion designer shine!
Key Takeaways: How to Make a Crop Top From a Big Shirt?
- Choose a big shirt that you no longer wear.
- Measure the desired length for your crop top.
- Mark the cutting line with chalk or pins.
- Carefully cut along the marked line.
- Finish the edges with a sewing machine or hand stitching.
Frequently Asked Questions
Q: What materials do I need to make a crop top from a big shirt?
To make a crop top from a big shirt, you will need the following materials:
– A big shirt that you want to transform into a crop top
– Scissors
– Measuring tape or ruler
– Pins
– Sewing machine or needle and thread
– Optional: fabric marker or chalk for marking
These materials will help you achieve the desired results and ensure that your crop top looks professional and well-made. Make sure to gather all the necessary supplies before you start the transformation process.
Q: How do I choose the right shirt for making a crop top?
When choosing a shirt to make a crop top, it’s important to consider the fabric, fit, and design. Look for a shirt that is made of a stretchy fabric, such as cotton or jersey, as it will be more comfortable and easier to work with. The fit of the shirt should be loose enough to allow for cutting and alterations, but not too oversized that it becomes difficult to shape into a crop top.
In terms of design, opt for a shirt with a straight or slightly curved hemline, as this will make it easier to create a clean and even crop top. Avoid shirts with complicated patterns or embellishments, as they may be challenging to work with. Ultimately, choose a shirt that you love and feel confident in, as it will make the transformation process even more enjoyable.
Q: How do I measure and cut the shirt to make a crop top?
Before cutting the shirt, measure how long you want your crop top to be. Use a measuring tape or ruler to determine the desired length, keeping in mind that you can always cut more later if needed. Once you have decided on the length, mark it with a fabric marker or chalk.
To cut the shirt, lay it flat on a table or cutting mat. Start by cutting off the bottom hemline, if there is one. Then, carefully cut along the marked line, ensuring that the cut is straight and even. If you prefer a more cropped look, you can cut higher on the shirt. Remember to try on the shirt as you go to ensure that you are happy with the length.
Q: How do I finish the edges of the crop top?
To finish the edges of the crop top and prevent fraying, you have a few options. One option is to use a sewing machine to sew a narrow zigzag stitch along the raw edges. This will create a clean and secure finish. If you don’t have access to a sewing machine, you can use a needle and thread to hand sew a running stitch or whipstitch along the edges.
Another option is to use fabric glue or fabric adhesive tape to seal the edges. Apply a thin layer of glue or tape to the raw edges and press them together firmly. Allow the glue or tape to dry completely before wearing or washing the crop top. Whichever method you choose, make sure to trim any excess fabric or threads for a neat and polished look.
Q: Can I customize my crop top with additional embellishments?
Absolutely! Once you have successfully transformed your big shirt into a crop top, you can get creative and add your own personal touch. Consider adding embellishments such as lace trim, sequins, patches, or even embroidery to make your crop top unique and stylish. Just make sure to attach any additional elements securely, either by sewing them on or using fabric glue. Have fun experimenting with different designs and make your crop top truly one-of-a-kind!
5 WAYS TO TUCK AND CROP A T-SHIRT (without cutting them!)
Final Thoughts on Making a Crop Top From a Big Shirt
So there you have it, a step-by-step guide on how to turn a big shirt into a trendy crop top. It’s amazing how a simple DIY project can transform an ordinary piece of clothing into a stylish fashion statement. By following these easy instructions, you can create a customized crop top that fits your style and personality.
Making a crop top from a big shirt is not only a fun and creative way to upcycle your old clothes, but it also allows you to showcase your individuality and fashion sense. Whether you’re looking to revamp your wardrobe or just want to try something new, this DIY project is definitely worth a try.
Remember to choose a shirt that you don’t mind cutting into, and don’t be afraid to experiment with different cuts and styles. Add some accessories or embellishments to make your crop top truly unique. With a little creativity and some basic sewing skills, you can turn a plain oversized shirt into a trendy crop top that will turn heads wherever you go.
So go ahead, grab that big shirt from your closet, and let your inner fashion designer shine. Get ready to rock your new crop top with confidence and style!